Showing posts with label Christmas. Show all posts

Tuesday, December 21, 2010

Dear Mum,...I sewed!!

Dear Mum,

It's been a little while since I last wrote to you, but I had to share some excellent news: I sewed!!

Now I know this is a small miracle in itself, particularly given my last attempt required your expert hand at sewing the hem properly and instructing me on which way to have my seams folded prior to whipping them up on the machine.  We know that my successes do not extend to needle and thread.

So let me tell you about my little experiment, because experiment it was!!   I have this lovely banner cutter for my Stampin up! Big shot.  I tell you what, that thing is pure genius; it cuts layers of fabric just as easily as card stock.  You just lay your fabric on top of the cutter, sandwich it between two layers of perspex, roll it through the Big Shot, and Ta-dah!! Lots of little banners.  So, I cut a stack of burlap and a stack of linen and this is where you would be proud....I pinned them together!  Pinning! I know!! Who would have thunk it!   Some banners were a little larger than others, but you know what, I didn't care. I thought it would add to the rustic look I was aiming for.

So Mum, I pinned the banners together and I hand sewed the first banner.... I have to say at that point I felt a little bit like you, sitting in front of the TV with a pile of sewing in my lap.

Now, I may have to ring Dad when you get to this point to get him to check you haven't fainted at the PC. 

Because that first banner took forever, and as you know I am entirely too impatient at times when it comes to results, I sewed the rest on my dusty and rarely used machine.  I know! Sewing machine,...me!

Is Dad still with you?

After I sewed the banners together, I pinned and sewed the little lace edge along the open front and the back edge onto the linen tape I had bought.

To finish the fronts I attached a little burlap and linen cut-out - also from the banner template - that I had ink stamped with Christmas sentiments like "Joy", "Thanks", "Cherish" and "Hope".  Lovely!

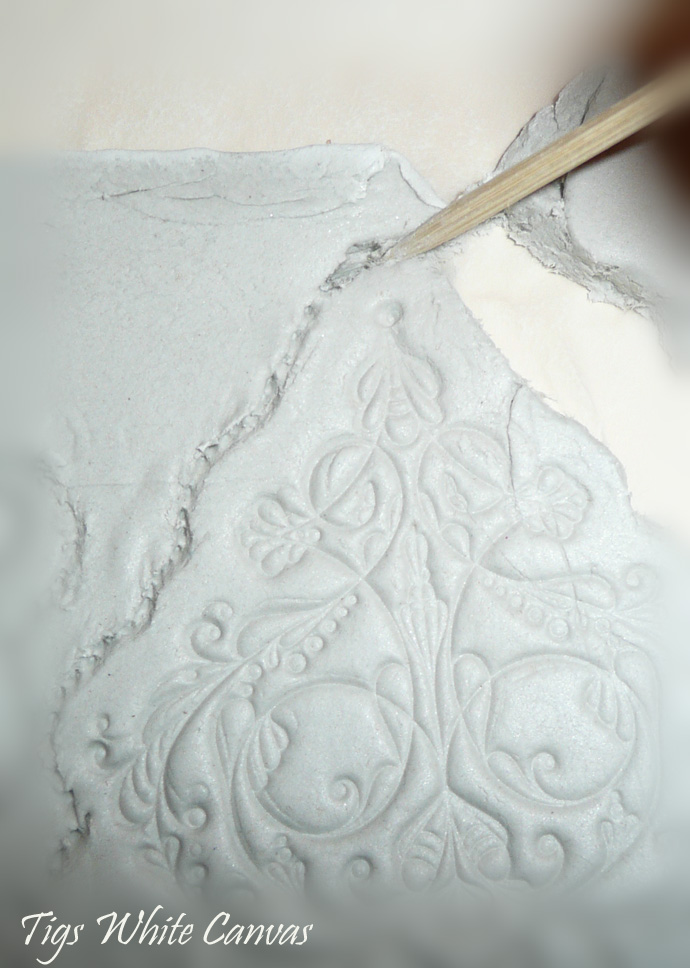
To add an extra dimension to the banner, I decided to include some clay tags - remember the Christmas ornaments I showed you how to make here? Well, this time I used my french script stamp and a scone cutter.

Oh, remind me if I ever make you scones that I cut clay tags with them and I shouldn't be using them for both tasks.

Once the clay tags dried, I was inspired by something you had done once before - remember when you were involved in the creative group that made textile pictures out of fabric that had been dyed with organic materials?  Well, I decided to tea stain the tags because I really wanted to keep the tonings in line with the rustic feel and I thought it would also bring the script out beautifully. 
I reckon beetroot would be quite interesting...though am not sure how moss would go.

I did also give the tags a little rub with a metallic white, but just a little - enough of a christmas pop without losing the rustic-ness.  I popped eyelets into the tape between banners, then tied the clay tags using twine.


I will post an extra photo to you tomorrow when the sun is out and is working in my favour for taking photos.

My plan on Christmas night is to pop some Lindt chocolates and little bits and pieces in them. And there, you have it - I sewed: the seams are straight, they may appear "inside out", but they are just how I wanted them to turn out.

Big hugs, love you,

Catherine
xxx

PS - I am going to pop this over at Jami's place for the Air your Laundry Friday, because that is where lots of lovely textile creativity can be found.  You can find her link on my side bar at the right if you would like to have a look. x

Monday, December 6, 2010

How to make - Christmas ornament tutorial

Hi sweet friends

Today I bring to you the instructions for my Christmas Ornaments. The gorgeous thing about these is that this is a “do your own thing” from the very start.  The only things that remain the same are the tools you will need, but after that, it is you and your beautiful creativity!

OK, grab yourself a cup of whatever takes your fancy - if you hadn't worked it out yet, my choice is coffee - and let’s get started.

Gather up all your necessary tools to make these lovelies.  To make my ornaments I used:

  • Air dry clay - I used DAS,
  • A rolling pin,
  • baking paper,
  • My gorgeous stamp from Stampin Up!,
  • A skewer or any sharp pointy object,
  • metal nail file;
  • Pearl white acrylic paint;
  • Glue;
  • Buffing gold;
  • Red Glitter
  • Red velvet ribbon.

First thing, get your lovely air dry clay out and roll it to your desired thickness.
  • I placed a sheet of baking paper on my bench and rolled my clay on top of this;
  • I placed two glass chopping boards on either side of my clay, no wider than my rolling pin, to make sure that I rolled my clay to a level depth.
  • Place a sheet of baking paper on top of your clay…and roll away!


Next, take your gorgeous stamp of choice and stamp your images;
  • be sure to leave space around your stamp for your shape.


Take your skewer or sharp pointy object – or you may even have the perfect cutting shape that you can use – and cut out your shape;
  • With the skewer method, start by “dotting” the outline of your shape around your stamp. This will help you to balance your shape and is easier to fix up with a gentle rub if it is in the wrong place.
  • Next, start joining the dots up to reinforce your shape,
  • Finally, use the longer edge of the point on your skewer and press all the way through to pull your shape out.
  • Press a hole through your shape for threading the ribbon.


Now your ornaments must dry for 24 hours…

…are they done? Beautiful!! Now it is time to give them a little tidy up.


Sand the edges;
  •  Using your metal nail file, gently sand around the edges of your shape until you are happy with the results.
  • If you need, this is the time to adjust the shape to ensure it is balanced – alternatively, if you are the type of person that likes a skewed uniqueness to your ornaments, just sand until it takes a shape you like.  


Decorating time!!

  • In the case of my ornaments, I brushed them first with pearl white acrylic paint.
  • Let the paint dry…I used my hairdryer to hurry this process along.
  • When dry, rub the buffing gold over your ornament until you are satisfied with the results.
  • Again, let dry, then re-stamp your image with Versamark ink or, if your stamp is not too ornate, draw inside the shape with a glue pen;
  • Sprinkle your glitter over your image; shake it, dust it off, then step back to admire.
  • Give a little “YEH!” because it is l-u-v-e-r-l-y.
You can choose to not follow this last instruction, though be warned you may spontaneously whoop, yell, laugh or clap your hands in glee – it is a side effect I found during this process, so consider yourself warned in advance.

  • Thread up your ribbon through the hole in the ornament and hang it up.
  • Dance some more…and feel very chuffed with yourself!!

I do recommend you follow this step, because I did and it felt GREAT!!!


Simple yet lovely!!

I hope you found my tutorial easy to follow and inspiring.  Please be sure to let me know if you give them a try, along with a photo!! 

Big hugs

Cath

xx

Enhanced by Zemanta

Thursday, December 2, 2010

My old gold Christmas Ornaments

Hello my lovelies

I am so sorry for my absence the past week - unfortunately we have been dealing with a full plate at home: aged family challenges, end of school year with exhausted chicklettes, work and anything else we can squeeze in-between. 

But I love and thank you all for checking in to say hi, both in email and here - it's lovely to be missed and it warms my heart to know you have stopped by. 

Right, down to the fun stuff....I have finished my ornaments for the great Christmas Ornament Swap...


Tomorrow these three little babies will be individually packed and posted to Canada and the US.

As you may recall, the challenge was to use red, green or gold (or a combination).  I considered my options for a while, but knowing I wanted to use this particular stamp from Stampin' Up!, I really wanted a classic look, so red and gold it was, topped off with some red velvet ribbon.

Do you like?  I did make it up as I went along, so made many mistakes and learnt from them.  I will provide a tutorial in my next post on what it was I did and what I used - mistake free of course - but in short I had a blast!!

To see all the fun and check out all the beautiful ornaments created for the Christmas Ornament Swap, pop over to the Flickr group here.

I am also going to link these pretties up to Kristin''s Uncommon Slice of Suburbia's Tuesdays Treasures, because I love sharing at Kristin's as she is a total sweetie!!

My Uncommon Slice of Suburbia

And speaking about Christmas and total sweeties, I have to finish writing my letter to Santa asking if I could pretty, pretty please, be the lucky recipient of one of these two Giveaways....

{sigh}


freckled laundry

Jami is giving away the most beautiful collection of items in celebration of 6 happy months in blog land, as well as reaching 500 followers.

Jami has extended the hand of blog friendship since my beginnings and is an inspirational, creative, textile goddess, not to mention a total sweetie!!


I can only dream to be capable of creating such a whimsical, magical hideaway as the Shabby Streamside Studio...Sandy is celebrating 1 year, and 1000 followers....what a milestone!

Not only that, but this is what Sandy shared when posting about this milestone and giveaway:
"Material things are meaningless compared to the daily cup of joy topped with foamy sunshine you serve me by sharing your visits, blogs, and comments..."

Another sweetie!!

So there you have it my lovelies, my Christmas Ornaments for my swap and a couple of Christmas wishes.

Big hugs to you all,

Cath
xx

Update: the tutorial for these can now be found here.  Enjoy!!

Tuesday, November 23, 2010

Summer time and Christmas ornaments


Greetings and hey there my lovely friends

This weekend past  I took my chicklettes to visit with my Mum and Dad who are lucky enough to live a two minute walk from the beach.

Silly me didn't think the water would be right for swimming yet - of course, I didn't factor in that kids don't care about these things.   On our first day we walked to the beach in our normal "it's too cold" clothes...and the kids just pulled up the legs on their pants and walked in...oh, all except my middle chicken, who had no qualms about going in the water with his shoes on!!!!?  

I don't know if he forgot he was wearing socks and lace up sandshoes...or whether he thought it would be fun to get the lot soaking wet! No matter the reason, I place the responsibility on genetics...on his father's side.

Sunday was a very different story: luckily, whilst packing for the trip and being completely unawares of my chill-factoring, the boys had packed board shorts, so they had a decent swim and a paddle, not to mention a decent dose of digging in the sand. 

Our little Bella Boo was quite content to roll in the wash or innocently annoy her brothers: I have no idea what the boys were hoping to find, but am pretty certain a little three year old plopping down in the middle of their hole was not part of the plan. Every time they struck water, she would migrate over to where they were and pop right into that little mini sand-bath. The boys, frustrated with a squealing happy three year old sitting in the middle of their fun, would move on to dig a new hole...and once more when they struck water, in she would plop. Happy as Larry. From where I sat, it really was very entertaining. Champagne should have been provided.


(see those knobbly knees, those are mine! )

I can't wait for a week with the kids down at Mum and Dads during the Christmas holidays; lazing, playing, swimming, eating prawns, oysters and beautiful summer fruit and just chilling out in general.


Speaking of Christmas, I am busy making ornaments for the Creative Colour Challenge - Ornament Swap that Louise Gale (Dream, Inspire, Create) is hosting.

The idea of this festive creativity is to make four Christmas ornaments; one for yourself and one each for three other people using the colours of Red, Green and/or Gold. We have to make sure they are in the post by 3rd December, and given all three of mine are overseas postings I should try to do it earlier than that!  I have played with a couple of different ideas, but think I have found a result I am happy with.  So I promise to be posting those very soon, with a tutorial (hoorah!)

Big hugs

Cath
xx
Enhanced by Zemanta
Related Posts Plugin for WordPress, Blogger...